
Choosing the best camera to convert for infrared.
The short answer
This page is not a ranked list of every camera on the market. I have not tested every camera on the market, and infrared results depend far more on the conversion, the wavelength and the lens than on which brand is on the front. What follows is the decision framework I would give a friend, plus honest notes on the ten bodies I have actually shot infrared with — my evaluation methodology explains what I do and do not claim to have tested.
The four decisions that matter
1. Mirrorless or DSLR
Mirrorless focuses using the imaging sensor, so a converted mirrorless body focuses correctly with any lens and any filter. A converted DSLR uses a separate phase-detect module, which must be calibrated at conversion time — accurate for the lens it was calibrated with, less so for others, and live view remains the fallback. That single difference is the strongest argument for mirrorless. Full comparison.
2. Full spectrum or a fixed wavelength
A fixed conversion is simpler and cheaper: one filter, no extra glass to carry, no vignetting surprises. Full spectrum costs more overall once you buy filters, but it makes one body do 590nm, 665nm, 720nm, deep infrared and even visible work. Full-spectrum and clip-in filters.
3. Which wavelength
If you want color, 590nm or 665nm. If you want monochrome, 720nm or 850nm. This is the decision people regret most often, and it is worth reading the wavelength comparison before ordering.
4. Sensor generation and megapixels
Less important than people expect. Infrared is a bright-sunlight, base-ISO discipline, so modern high-ISO performance rarely comes into play. An older 10MP body in good sun will out-shoot a newer body pointed at flat overcast light. What older bodies cost you is live view, tethering and dynamic range in deep shadow.
The bodies I have shot infrared with
First-hand experience only. Bodies I have not owned are not listed.
| Body | Sensor | Converted to | Best suited to |
|---|---|---|---|
| Nikon D70 | 6MP CCD, 2004 | 590nm | Someone who wants to find out whether they like infrared before spending real money. |
| Nikon D70 | 6MP CCD, 2004 | 720nm | A beginner who wants monochrome straight out of camera on the smallest possible budget. |
| Nikon D200 | 10MP CCD, 2005 | 720nm | Black-and-white infrared landscape work on a small budget. |
| Nikon D750 | 24MP CMOS full frame, 2014 | 665nm | Anyone who wants one dedicated false-color infrared camera and already owns F-mount glass. |
| Nikon Z7II | 45MP CMOS full frame, 2020 | Full spectrum | Someone who wants every wavelength from one body and does not want to own several converted cameras. |
| Nikon Z7II | 45MP CMOS full frame, 2020 | 850nm | Anyone who wants the most dramatic, contrast-heavy monochrome and is happy to work in bright sun or on a tripod. |
| Canon 40D | 10MP CMOS APS-C, 2007 | Full spectrum | Canon shooters who want full-spectrum flexibility without buying a new mirrorless body. |
| Nikon D40X | 10MP CCD, 2007 | 720nm | A compact, low-cost monochrome body for travel or hiking. |
| Nikon D300 | 12MP CMOS APS-C, 2007 | 720nm | Anyone who wants a rugged APS-C DSLR for landscape and bracketing work. |
| Nikon D60 | 10MP CCD, 2008 | 590nm | A beginner who wants false-color infrared and the classic CCD look for very little money. |
Nikon D70 — 590nm
The cheapest way into infrared I have found. CCD color rendering gives warm, saturated false color and the files hold up fine at web and modest print sizes. Live view does not exist, so composition is viewfinder-only.
Nikon D70 — 720nm
The same bargain body as the 590nm version, but converted to a deeper cut-on. 720nm strips out most color and delivers the bright-white foliage, black-sky look with very little post-processing. Another low-risk way to discover whether infrared is for you.
Nikon D200 — 720nm
My monochrome body. 720nm on a CCD sensor produces the classic bright-foliage, black-sky look with very little work in post. Base ISO only — high ISO on a sensor this old is not worth using.
Nikon D750 — 665nm
The body most of the false-color frames in the archive were made on. 665nm on full frame gives enough color separation for a clean channel swap while keeping foliage bright. DSLR phase-detect AF needed a conversion-time calibration and is accurate with the lenses it was calibrated for.
Nikon Z7II — Full spectrum
The most flexible of the mirrorless bodies and the one I would buy again first. Because mirrorless focuses off the imaging sensor, focus is correct at whatever wavelength the filter in front of the lens is passing — no per-lens calibration. I switch between infrared, a 720nm look and an orange full-spectrum look by changing filters.
Nikon Z7II — 850nm
Deep infrared on a mirrorless body. 850nm is almost pure monochrome, with glassy skies and foliage that glows like snow. Exposures are longer than at 720nm, so a tripod helps, but the clean, sculptural look is worth it.
Canon 40D — Full spectrum
A solid APS-C DSLR converted to full spectrum. Like any full-spectrum DSLR, it needs a filter in front of the lens or behind the mount for every shot, and the phase-detect AF must be calibrated for the lens you use most. Once that is done, it delivers the same wavelength flexibility as a full-spectrum mirrorless body at a much lower price.
Nikon D40X — 720nm
A lighter, smaller CCD Nikon that delivers the same bright-foliage, dark-sky 720nm look as the D200. Controls are simpler and the files are clean at base ISO, though live view is absent and high ISO is best avoided.
Nikon D300 — 720nm
A more responsive APS-C DSLR than the older CCD bodies, with a larger buffer and usable live view for tripod work. Converted to 720nm it is a straightforward monochrome machine, though the phase-detect AF still needs calibration for your most-used lens.
Nikon D60 — 590nm
A small, late-model CCD Nikon. 590nm keeps enough visible color for warm, golden-pink foliage, and the files share the same saturated CCD character as the D70. It is one of the cheapest ways to experiment with color infrared.
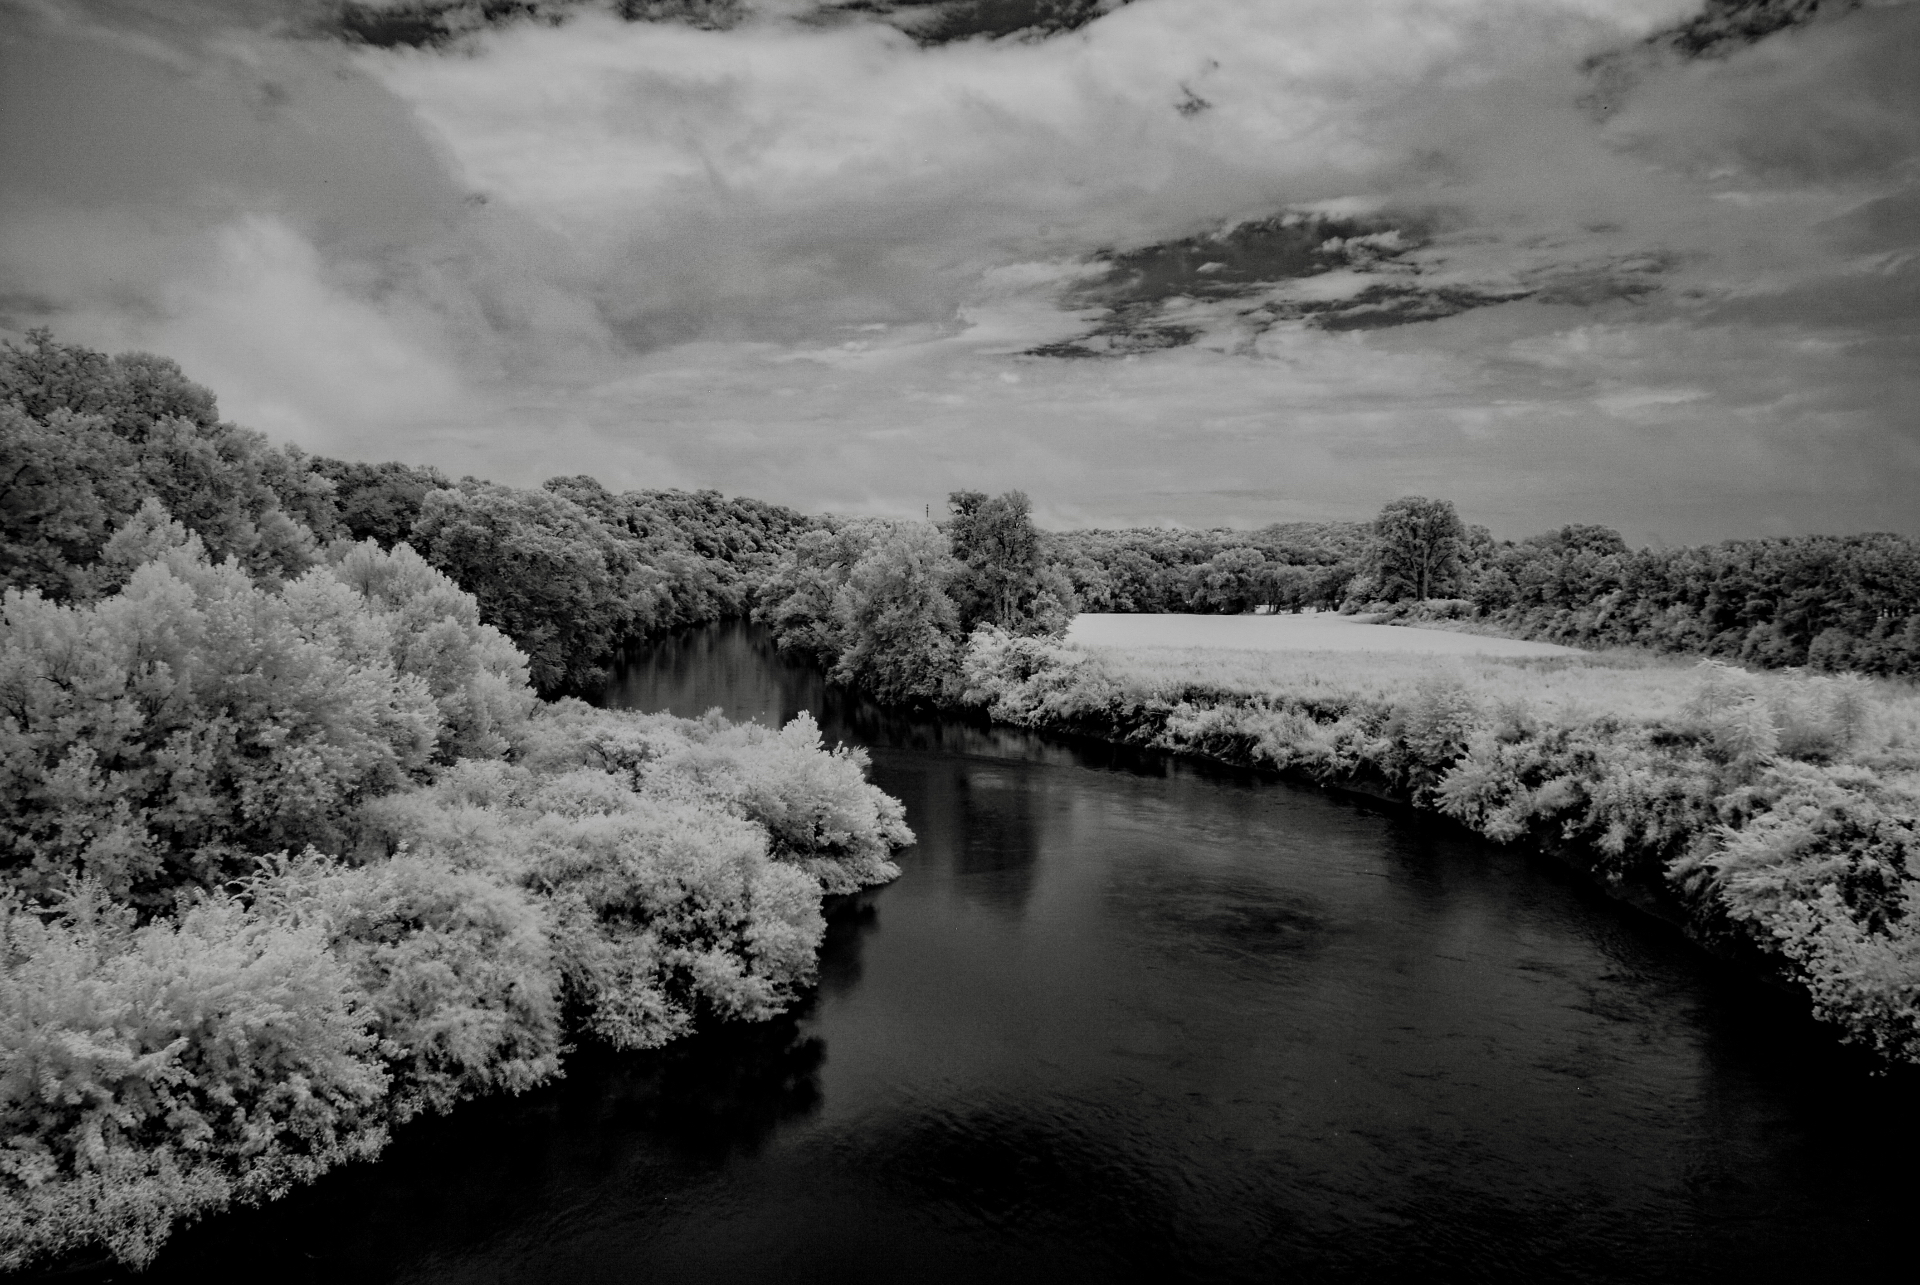
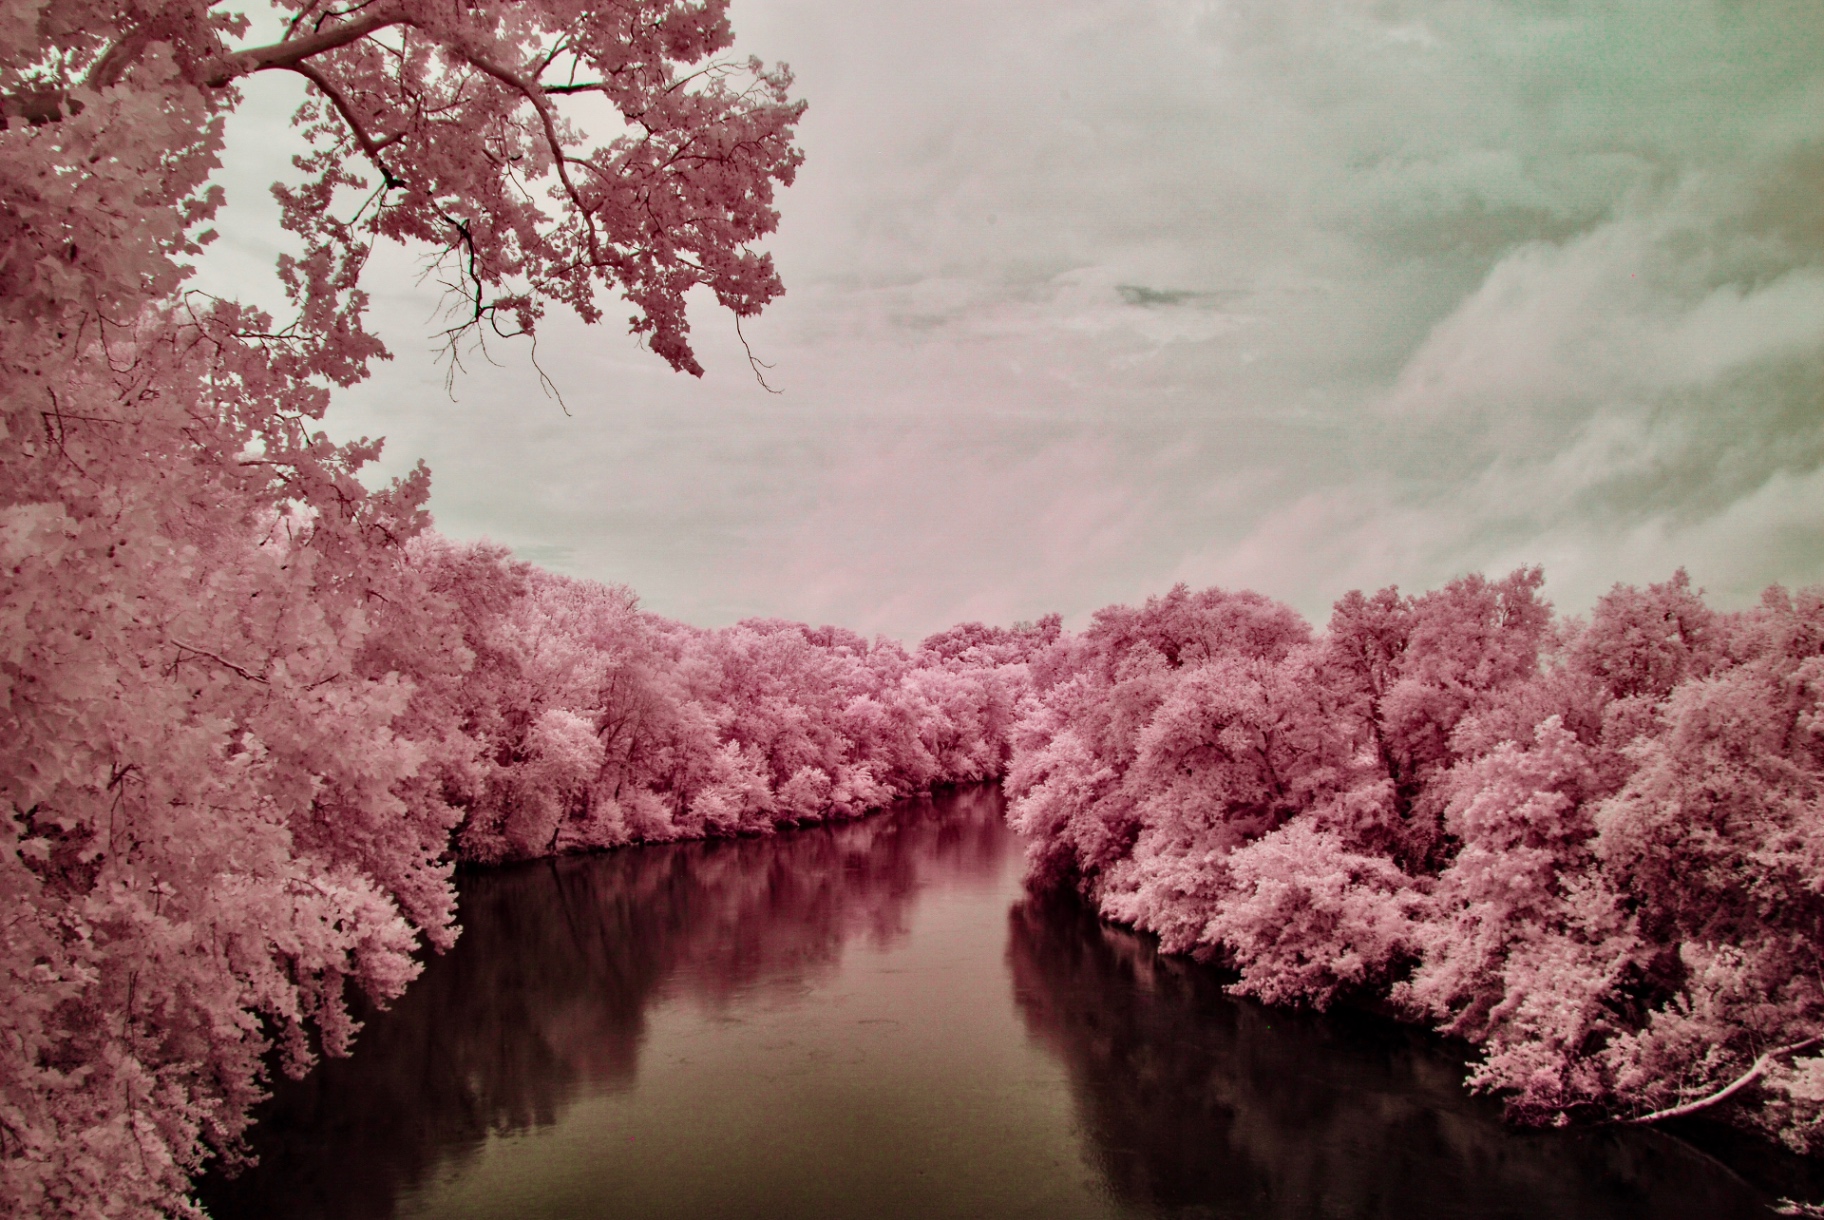
720nm is often treated as a monochrome wavelength, but it does not have to be. With a custom white balance and a channel swap, a 720nm file can still deliver color — just more subtle and pastel than the warmer cuts. The photo below is the same river, on the same Nikon D200 at 720nm, processed for false color.
My recommendations, by who you are
These are editorial recommendations drawn from the ten bodies above and the wavelengths I shoot. They are not tests of every camera on the market — see the methodology. No prices are quoted here because they change; check current pricing at the source.
Best for a first infrared camera on a small budget
A used mid-2000s DSLR converted to 720nm
My recommendation
Buy the cheapest healthy used body you can find in a system you already own glass for, and have it converted to a fixed 720nm.
Why I recommend it
This is the route my Nikon D200 took, and it is still the camera I reach for when I want classic black-and-white infrared. 720nm needs the least processing to look right, so you spend your first months learning to see infrared rather than fighting a channel swap. Because the body is cheap, a conversion you later outgrow costs little.
Pros
- Lowest total cost of any route into real infrared files
- 720nm gives a strong result straight out of camera
- Uses lenses you may already own
- Nothing to carry in front of the lens in the field
Cons
- Fixed wavelength — no color work later without a second body
- Older bodies have poor high-ISO and often no live view
- Phase-detect autofocus needs calibration at conversion time
Infrared-specific considerations
- Ask the converter to calibrate autofocus with the lens you use most.
- Test each lens for hotspots at the apertures you actually shoot before committing.
- Infrared is a bright-sun, base-ISO discipline, so an older sensor is less of a limitation than it sounds.
Compatibility to check first
Any DSLR can be converted, but the lens matters more than the body — check the hotspot guide first.
Alternatives
Want color instead of monochrome? Convert to 665nm rather than 720nm. Not ready to modify a camera at all? A screw-on infrared filter on an unconverted body works, at the cost of tripod-length exposures.
Links to Kolari Vision are affiliate links: if you buy through them the site earns a commission at no extra cost to you. They are the shop my own conversions and filters came from, and the recommendation would be the same without the program — full disclosure.
Best for false-color landscape work
A full-frame body converted to 665nm
My recommendation
If the pink-and-cyan look is what drew you in, convert to 665nm rather than 720nm.
Why I recommend it
Most of the false-color frames in the archive — including the chemical ponds and the road in pink — are 665nm files from a converted Nikon D750. At this cut-on there is still real separation between channels, so the red–blue swap produces genuine color rather than a tint forced onto a monochrome file.
Pros
- Enough visible light survives for a true channel swap
- Still bright, high-contrast foliage
- One body, one look, no filters to carry
Cons
- Less dramatic than 720nm if you mainly want black and white
- Requires more processing knowledge than 720nm
- Fixed conversion means committing to the color route
Infrared-specific considerations
- Set a custom white balance off sunlit grass at the location — this matters more at 665nm than anywhere else.
- Adobe's 2000K white balance floor may need a camera profile made for converted bodies.
Alternatives
590nm for warmer, more golden foliage; see how the four wavelengths differ.
Links to Kolari Vision are affiliate links: if you buy through them the site earns a commission at no extra cost to you. They are the shop my own conversions and filters came from, and the recommendation would be the same without the program — full disclosure.
Best for one camera that can do every infrared look
A full-spectrum mirrorless body plus a filter set
My recommendation
If you can only justify one converted camera and it is mirrorless, convert it to full spectrum and buy filters instead of second bodies.
Why I recommend it
My Z7II is converted this way, and it is the one I would buy again first. Mirrorless focuses off the imaging sensor, so focus stays correct at whatever wavelength the filter is passing — no per-lens calibration. Changing the look is a filter change, not a second camera.
Pros
- Every wavelength from one body, chosen per shot
- Focus is accurate at any wavelength with any lens
- The EVF previews the actual infrared image
- Can shoot visible light again with a hot-mirror filter
Cons
- Highest total cost once filters are included
- Something always has to go in front of, or inside, the camera
- Clip-in filters are mount-specific and mirrorless-only
Infrared-specific considerations
- Clip-in filters sit between mount and sensor, so one filter covers every lens and ultra-wides don't vignette.
- Screw-on filters work on any body but multiply with every filter diameter you own.
Compatibility to check first
Clip-in filters are made per mount (Nikon Z, Sony E, Canon RF, Fuji X). Confirm your exact mount before ordering, and confirm the filter set covers the wavelengths you want.
Alternatives
A dedicated single-wavelength conversion if you know the one look you want — simpler, cheaper, and nothing extra to carry.
Links to Kolari Vision are affiliate links: if you buy through them the site earns a commission at no extra cost to you. They are the shop my own conversions and filters came from, and the recommendation would be the same without the program — full disclosure.
The three routes side by side
| Route | Typical body | Look you get | Flexibility | Main trade-off |
|---|---|---|---|---|
| Fixed 720nm conversion | Cheap used DSLR | Classic black and white | One wavelength only | No color work later |
| Fixed 665nm conversion | Full-frame DSLR or mirrorless | False color after a channel swap | One wavelength only | More processing to learn |
| Full spectrum + filters | Mirrorless | Any, chosen per shot | Highest | Highest cost, filters to carry |
| Filter on an unconverted camera | Any camera you own | Weak infrared, long exposures | Low | Tripod required; not a daily practice |
Fixed 720nm conversion
- Typical body
- Cheap used DSLR
- Look you get
- Classic black and white
- Flexibility
- One wavelength only
- Main trade-off
- No color work later
Fixed 665nm conversion
- Typical body
- Full-frame DSLR or mirrorless
- Look you get
- False color after a channel swap
- Flexibility
- One wavelength only
- Main trade-off
- More processing to learn
Full spectrum + filters
- Typical body
- Mirrorless
- Look you get
- Any, chosen per shot
- Flexibility
- Highest
- Main trade-off
- Highest cost, filters to carry
Filter on an unconverted camera
- Typical body
- Any camera you own
- Look you get
- Weak infrared, long exposures
- Flexibility
- Low
- Main trade-off
- Tripod required; not a daily practice
Comparison reflects the routes discussed on this site. Bodies are examples, not an exhaustive market survey.
Next step
Where I had my own cameras converted.
All four bodies above were converted by Kolari Vision, and my filters came from there too. That is why they are the shop linked from this page. Pricing and turnaround change, so check them at the source rather than trusting a number in an article.
Links to Kolari Vision are affiliate links: if you buy through them the site earns a commission at no extra cost to you. They are the shop my own conversions and filters came from, and the recommendation would be the same without the program — full disclosure.
Common questions
Do I need a full-frame camera for infrared?
Is a CCD sensor better for infrared than CMOS?
Can I convert a camera myself?
What about Canon, Sony and Fujifilm bodies?
Related guides
Links to Kolari Vision are affiliate links: if you buy through them the site earns a commission at no extra cost to you. They are the shop my own conversions and filters came from, and the recommendation would be the same without the program — full disclosure.